

top of page

2026 Best Motorcycle GPS Mount for Your Bike?

A Motorcycle GPS Mount looks like a small accessory, but it can change how easily a rider checks a route. A loose clamp, vibrating screen, or awkward reach can turn a quick glance into a distraction. The choice is not only about fit. It is about keeping the display stable, visible, and within comfortable reach.

The risk deserves context. NHTSA’s 2022 Traffic Safety Facts: Motorcycles reported 6,218 motorcyclist deaths in the United States, representing 15% of all traffic fatalities that year. That report does not show that GPS mounts prevent crashes. They do not. Former NHTSA Administrator Dr. Mark Rosekind offered a useful reminder: “When you’re behind the wheel, your only job is to drive.” Riders should set routes before moving and avoid treating a mount as permission to watch a screen.

Small details matter. Check handlebar diameter, device size, case compatibility, locking design, and vibration control. A sturdy mount can still block a gauge or transmit harsh vibration. Cheap mounts may look convincing in a product photo. Real roads are less forgiving.

This guide compares mounting styles, materials, adjustability, and everyday usability for 2026. It also flags trade-offs instead of pretending one model suits every bike. That part is easy to overlook. NHTSA figures describe the stakes, not the performance of any product. Review fit carefully, test the setup while parked, and keep your attention on the road.
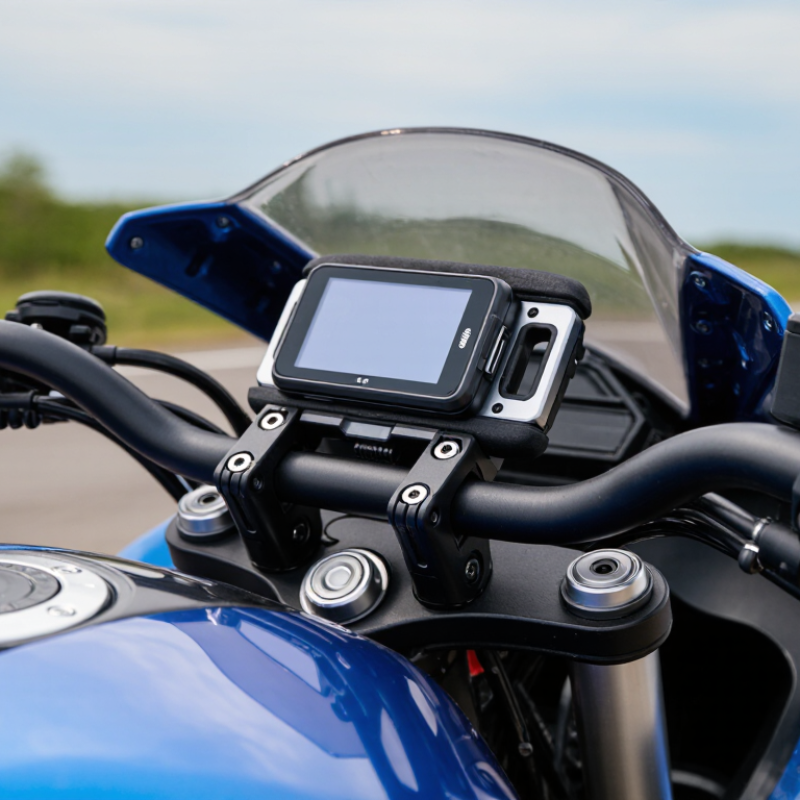
2026 Best Motorcycle GPS Mount for Your Bike?

What a Motorcycle GPS Mount Is and How It Works

A motorcycle GPS mount is the bracket or cradle that holds a navigation device within the rider’s view. It attaches to a stable point, such as a handlebar or crossbar, and keeps the screen from shifting over bumps. The GPS device calculates its position; the mount does not provide satellite reception. Its job is physical support and useful screen placement. Simple distinction.

Most mounts use a clamp, a cradle, or both. A clamp grips the bike, while the cradle holds a phone or dedicated navigation unit. Check the handlebar diameter and device dimensions before choosing one. A snug fit matters, but excessive tightening can damage some bars or clamps. That detail is easy to overlook.

On rough roads, vibration can blur a screen or strain a device’s camera hardware. Some mounts add rubber dampers to reduce transmitted shock, though they cannot remove every vibration. Position the screen where a quick glance feels natural, without blocking instruments or controls. Rain protection depends on the device and any separate cover, not just the mount. Power may come from a cable, but many devices can also run on battery. Set the route before riding, then pull over if adjustments are needed. It is tempting to trust a neat setup completely; I would still check the clamp after installation and again after the first bumpy ride.

2026 Best Motorcycle GPS Mount for Your Bike? — What a Motorcycle GPS Mount Is and How It Works

A GPS mount secures a navigation device to the motorcycle; it does not receive GPS signals itself. Check your handlebar diameter before choosing a clamp-style mount.

Common nominal handlebar diameters shown: 22.2 mm (7/8 in), 25.4 mm (1 in), and 28.6 mm (1 1/8 in). Measure the section where the mount will attach and confirm its stated fit range; actual fit depends on the mount design.

Main Types of Motorcycle GPS Mounts and Their Uses

2026 Best Motorcycle GPS Mount for Your Bike?

Main Types of Motorcycle GPS Mounts and Their Uses

Handlebar-clamp mounts are a common option because they fit many cockpits and allow easy angle adjustment. Check your bar diameter and leave room for the throttle, levers, and cables. A screen that looks clear while parked can become hard to read in bright sun. Keep it within a quick glance, not directly in your main sightline. Stem mounts place a GPS near the center of the handlebars, which can make directions easy to see. They only work with compatible steering stems, though. It can wobble. Check the fit before relying on it.

Mirror-stem mounts can raise a device above crowded controls, but confirm the threaded point is suitable and secure. Crossbar mounts suit bikes with a cockpit bar, often found on touring and adventure models. They can offer a stable position, but added height may catch more wind or block part of the instrument panel. No position is perfect. A clear GPS screen may still hide a warning light, so check the view from your normal riding posture. After installation, turn the handlebars fully in both directions and look for cable tension or contact. Recheck fasteners after the first ride, especially on rough roads.

Key Factors for Choosing a GPS Mount in 2026

Choosing a motorcycle GPS mount in 2026 starts with fit, not appearance. Check your handlebar diameter, available mounting points, and clearance from the controls. The mount should hold the device firmly without blocking the instrument panel or interfering with steering. Small details matter. A cramped cockpit can turn a quick glance into an awkward reach.

Vibration isolation is important, especially on rough roads, where constant shaking may affect screen stability and device hardware. Look for a secure locking mechanism, weather protection suited to your rides, and a charging option that keeps cables clear of moving parts.

NHTSA reported 6,335 motorcyclist deaths in 2023, representing 15% of all U.S. traffic fatalities in its Traffic Safety Facts: Motorcycles, 2023 report. That statistic does not prove a GPS mount improves safety, but it highlights why clear, low-distraction navigation matters.

Check it again. A mount that feels solid in a garage may shift after a bumpy ride, so inspect its position before longer trips. No setup removes every distraction; keep routes simple and stop somewhere safe when adjustments are needed.

How to Install and Secure a GPS Mount on a Motorcycle

2026 Best Motorcycle GPS Mount for Your Bike?

A secure GPS mount starts with the right position. Choose a solid handlebar section or another mounting point approved for your motorcycle. Measure the bar diameter before selecting a clamp; a close fit matters. Keep the screen clear of cables, switches, and the instrument panel. Turn the handlebars fully in both directions to check for contact. Small changes help.

Follow the mount’s installation instructions and use its specified hardware. Wipe dirt and oil from the clamping area, then tighten bolts evenly to the recommended torque. Too little pressure can allow movement, while overtightening may damage the clamp or bar. Add vibration-damping parts only when the mount is designed to accept them. Check that the GPS locks firmly into place.

Before riding, pull gently on the mount and confirm it does not shift. No setup removes every vibration, so inspect the fasteners after the first short ride and periodically afterward. Recheck them with the motorcycle parked and cool. Make sure the display is readable without blocking your view of the road. If it takes too much attention to glance at, reposition it; that small adjustment is easy to overlook.

How to Compare Mounts for Stability, Compatibility, and Value

A good motorcycle GPS mount should keep the screen steady without making the controls awkward to reach. Compare how it attaches to your handlebar, crossbar, or existing mounting point, then check the listed diameter range before ordering. A clamp that nearly fits is not a secure fit. Look for firm contact surfaces and a locking mechanism that resists vibration, especially if your usual routes include rough pavement. Small details matter. A tether can provide extra protection if the main attachment loosens, but it should not interfere with steering or cables.

Compatibility goes beyond the mount itself. Check that its cradle suits your device’s size and case, and that you can still operate buttons or connect a charging cable. If you ride in rain, confirm how the mount handles exposure; the mount alone does not make a phone weatherproof. For value, compare included hardware, adjustment range, and replacement-part availability, not just the purchase price. I still find one trade-off easy to overlook: a highly adjustable arm can position the screen beautifully, yet may wobble more than a compact setup. Before a long ride, fit it while parked and test visibility from your normal seated position. The screen should be easy to glance at, not a reason to take your eyes off the road.

2026 Best Motorcycle GPS Mount for Your Bike? — How to Compare Mounts for Stability, Compatibility, and Value
Mount type Typical fit Stability
(1–5)
Compatibility Installation Relative cost Best suited for What to check
Handlebar clamp Round handlebars; commonly available with inserts for sizes such as 22 mm, 25.4 mm, or 28.6 mm 4/5 Good when the clamp’s specified diameter matches the bike’s bar and there is enough clearance About 10–20 minutes; usually requires basic hand tools Medium Most bikes with accessible, round handlebars Measure the bar where the clamp will sit. Check clearance from controls, cables, and the tank at full steering lock.
U-bolt handlebar mount Round bars within the mount’s stated diameter range 4/5 Broad fit range on compatible round bars; may not suit bars with unusual shapes or limited space About 10–20 minutes; tighten evenly and recheck after riding Low to medium Riders seeking a straightforward, adjustable handlebar attachment Confirm the U-bolt dimensions, included spacers, and clearance. Avoid overtightening, which can damage bar finishes or components.
Mirror-stem mount Mirror mounting points with a compatible thread, stem, or adapter 3/5 Depends on mirror location, thread size, and available adapter; fit is not universal About 10–25 minutes; may require removing and refitting a mirror Low to medium Bikes with limited handlebar space and a suitable mirror mounting point Verify the thread and orientation before purchase. Check that the device does not obstruct the mirror or rider’s view.
Crossbar clamp A handlebar crossbar, when the motorcycle has one 4/5 Limited to bikes with a suitably sized, accessible crossbar About 10–20 minutes; fit depends on bar diameter and clearance Low to medium Bikes that already have a compatible crossbar Many motorcycles do not have a crossbar. Check its diameter and make sure the mount clears the controls and cables.
Adhesive or flat-surface mount Clean, flat surfaces approved for the mounting adhesive 2/5 Surface-dependent; curved, textured, hot, or exposed surfaces can reduce adhesion About 15–30 minutes, plus the adhesive’s specified curing time Low Limited-use installations where a suitable surface and backup retention are available Motorcycle vibration, weather, heat, and wind load can challenge adhesive mounts. Not the preferred choice for a valuable device on a long ride.

Comparison note: Stability ratings are relative, design-based guidance—not results from a standardized product test. Actual performance depends on the bike, installation, road conditions, and device weight. Check the mount’s stated fit range and the GPS device’s retention requirements before buying.

bottom of page